Ahorra un 25 % (o incluso más) en tus costes de Kafka | Acepta el reto del ahorro con Kafka de Confluent
Learning with LiveStreams: Cloud-Native Apache Kafka and Serverless Stream Processing
LiveStreams is a YouTube show about Confluent, real-time data streaming, and related technologies that help you maximize data in motion on any cloud.
Every episode of LiveStreams will teach you something valuable about coding and DevOps. From end-to-end demos, to live coding experiences with interactive lessons, and Q&A sessions, you’ll get plenty of hands-on experience using Kafka and Confluent.
Created with the purpose of answering common questions from customers and community members around the world, we answer popular questions such as:
- When should I use Avro or Protobuf?
- How can I use ksqlDB in my microservice?
- How can I use Kafka Streams in my Spring Boot application and connect it to Confluent Cloud?
New episodes come out every Tuesday, so get ready to learn new skills, build next-gen applications, and harness the value of real-time data!
As the host of this show, I thought I’d share some highlights and key takeaways that you can get by watching the best episodes of Livestreams.
Episode 001: Set up Spring Boot and Confluent Cloud from scratch
In this inaugural episode of Livestreams, you’ll learn how to quickly set up Spring Boot with Confluent Cloud. First, you will start with Spring Initializr and then use Java 11 and Gradle to develop and build the project. Spring conventions are opinionated, and a key concept is templates, which cut down on boilerplate code for some of the native libraries (producer, consumer, and AdminClient). Next, you’ll add a KafkaTemplate to produce messages and set up a sample topic.
The Confluent Cloud UI already has an integration with Spring Boot, so you’ll need to go to the clients config and copy a Spring Boot config snippet. Don’t forget to use the correct API key in your application’s properties. Back in your Java code, you’ll add the config and choose the number of partitions and replicas. Finally, you’ll check the Confluent Cloud UI to see that messages are being produced so that you can set up a consumer class in your code.
Episode 002: Process data with Kafka Streams
In this episode, you’ll grow your toolkit with Spring for Kafka Streams. First, you’ll add a Java annotation that enables an injection of the StreamsBuilder class. StreamBuilder allows you to configure a topology for processing streams. Using the NewTopic bean, you’ll explicitly create topics because automatic topic creation is not a best practice.
You’ll consume movie quote data streams from one topic and use a map function to break them into individual words, then write word counts to a new topic (i.e., the number of times that a given word appears in a quote). As a bonus, you’ll also learn how to locate the best server (based on latency of your application) for your application with gcping.
Episode 003: Optimize data in motion with binary formats
Progress from the plain strings and longs of episodes 001 and 002 to the binary formats, namely Avro and Protobuf—whose compaction efficiencies will save you bandwidth and storage. You’ll produce in Avro, send to Confluent Cloud, then consume the Avro, and convert to Protobuf with Kafka Streams in your application code. To accomplish this, you’ll need to learn how to define Avro and Protobuf schemas for tasks running with Gradle, how to set up a producer and consumer with Spring for Kafka templates, and how to wire your application to Confluent Cloud.
Episode 005: Kafka Devops with Confluent Cloud and ccloud-stack
ccloud-stack is a great tool to automate tasks like provisioning servers, configuring ACLs, and creating API keys in Confluent Cloud. It’s a set of shell scripts that let you quickly provision a Kafka cluster on Confluent Cloud, because it generates a config file with connection information, including credentials. You can also use the ccloud-stack to verify that your cluster is up and available to serve requests. In this Livestreams episode, you’ll generate Confluent Cloud configs in the language of your choice so that you can then paste them into your consumer and producer code. Then, you’ll push data to Confluent Cloud from a local Postgres instance using a JDBC source connector. Finally, you’ll delete your Confluent Cloud setup quickly, again leveraging the ccloud-stack.
Episode 006: Building event-driven microservices
This Livestreams episode teaches you how to set up an entire microservices application using Spring Boot, Kafka Streams, Kotlin, Java, and ksqlDB. It simulates a change data capture pattern whereby an existing data source is bridged to Kafka in real time. You’ll provision your Confluent Cloud with ccloud-stack, then use a data generator to place some data into a Postgres instance, which you’ll push to Confluent Cloud using the Kafka Connect JDBC Source Connector. You’ll use Kafka Streams for processing, and this time the Kafka Streams Transformer, which will let you process events one by one while interacting with a state store—a local embedded instance of RocksDB. You’ll derive new streams from an existing stream and turn a topic into a table in ksqlDB, which will allow you to perform a join that enriches one stream with the data from another.
Episode 007: Implement the ksqlDB Java client
The ksqlDB Java client lets you interact with a ksqlDB server on Confluent Cloud from your Java application. It’s an alternative to using the REST API or CLI, which can be cumbersome if you need to use ksqDB programmatically. In this episode, you’ll use the dataset from episode 006, turn an existing topic into a ksqlDB table, and perform a SELECT query that emits changes. And finally, you’ll iterate over the results from the Java code.
Episode 008: Experiment with ksqlDB and Project Reactor
This episode covers recent versions of Spring Boot reactive components implemented using Project Reactor. The ksqlDB client implements a Reactive Streams specification. You’ll try to integrate the two: the ksqlDB Java client and Project Reactor. You’ll experiment with sending data using Project Reactor’s Mono API. You can see episode 009 for the conclusion of this experiment.
Episode 011: Generate materialized views
Apache Kafka® provides sequential access to the records. This episode shows you how to implement random access to the data in Kafka—so you’ll create a lookup table for a Java service using a KTable. You’ll use Spring and Confluent Cloud to construct a microservice that builds a materialized view with the data from a Kafka topic and then makes it available with a REST interface. You’ll also use the TopologyTestDriver to test your Kafka Streams topology.
Episode 015: Combine Kubernetes, Spring Boot, and Kafka Streams
Well, we’ll do this again! This extended (over two-hour!) workshop teaches you how to combine serverless Kafka using Confluent Cloud, Kubernetes on Google Kubernetes Engine (GKE), and a Spring Boot application. You’ll go through the implementation of two apps, a movies-generator that loads movie data into your Kafka cluster and randomly generates new ratings, and a ratings-processor, which processes new ratings, constantly recalculating the current rating based on newly arrived data. You will learn how to use the Gradle plugin to generate Java POJOs based on Avro schemas. You’ll get an overview of your streams topologies using the Kafka Streams Topology Visualizer. You’ll deploy to Kubernetes with Skaffold to GKE. A local deployment setup option is also available (via k3d or minikube). You’ll then create a materialized view of your data using ksqlDB.
Episode 018: Functional API in Spring Cloud Stream with Kafka
Historically, Spring Cloud Stream was a complex tool. It has come a long way from being a wrapper on top of a Spring integration framework, and the API and vocabulary are rather complicated. With the changes introduced in version 3.0, Spring Cloud Stream has transitioned to a more functions-based approach, basically a “function-as-a-service” style of programming. And it’s not hard to use once you learn some of its conventions. You’ll use the standard “source, process, sink” pattern to generate, manipulate, and place data. With just two functions and a configuration, you’ll effectively create a full event-driven application. 🎉
New episodes coming soon
I hope you are excited to rewatch (or watch for the first time, in case you missed an original run of the stream) Livestreams and join me for the next two episodes:
- Livestreams 023: How to Manage Secrets for Confluent with Kubernetes and HashiCorp Vault
- Livestreams 024: Event-Driven Microservices with Apache Kafka, Kotlin, and Ktor
Also, make sure to subscribe to our YouTube channel and enable notifications so you won’t miss any new videos.
¿Te ha gustado esta publicación? Compártela ahora
Suscríbete al blog de Confluent
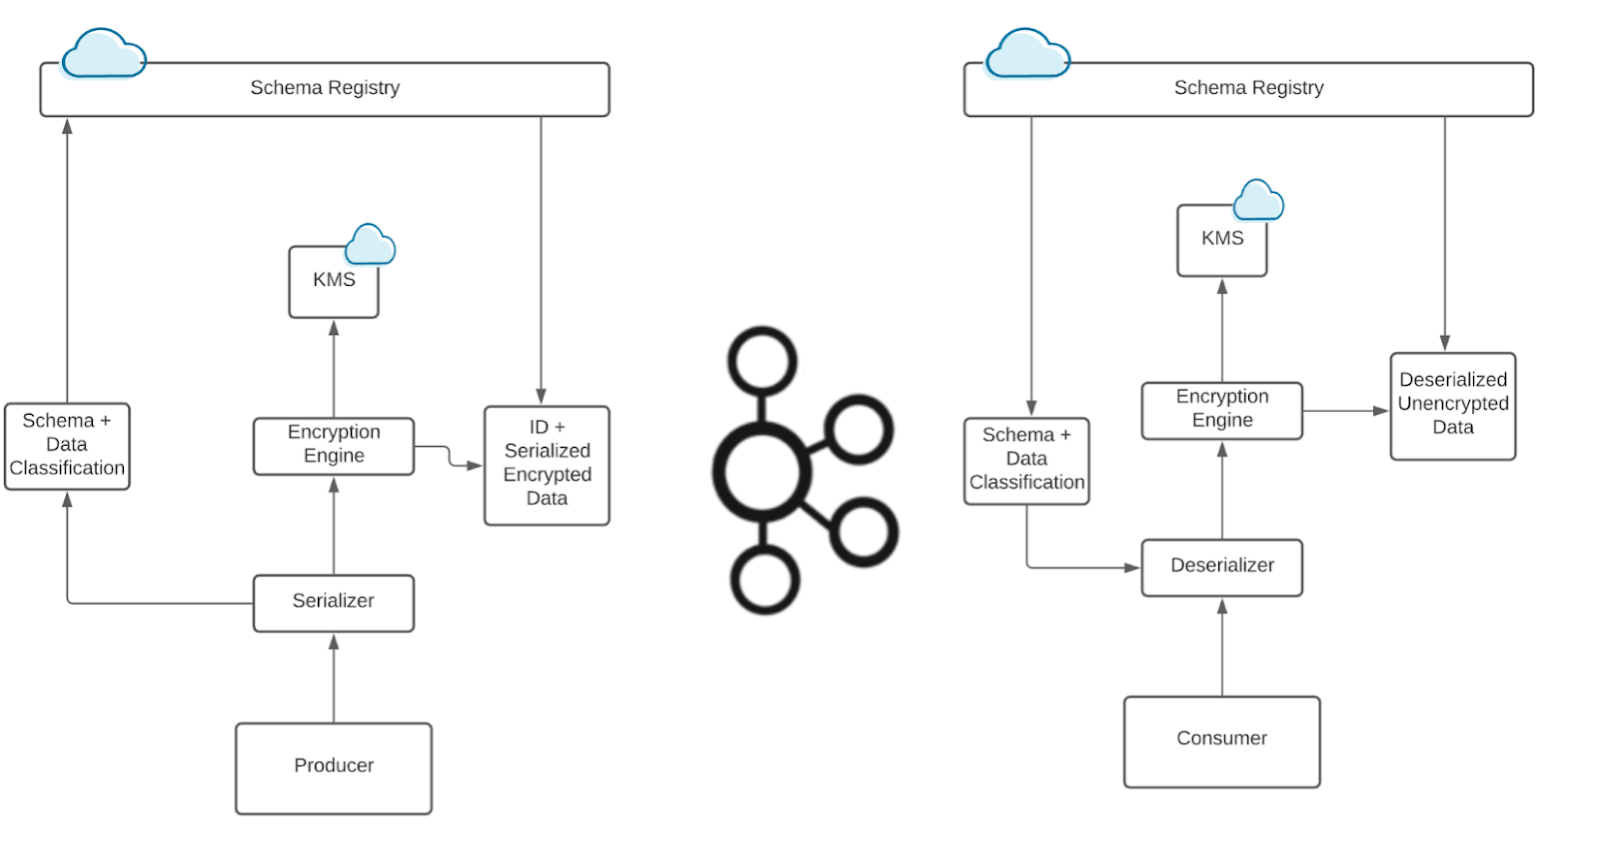
How to Protect PII in Apache Kafka® With Schema Registry and Data Contracts
Protect sensitive data with Data Contracts using Confluent Schema Registry.
Confluent Deepens India Commitment With Major Expansion on Jio Cloud
Confluent Cloud is expanding on Jio Cloud in India. New features include Public and Private Link networking, the new Jio India Central region for multi-region resilience, and streamlined procurement via Azure Marketplace. These features empower Indian businesses with high-performance data streaming.

